Record the exclusive bike information on the side of the box with your phone. Make sure it is with correct direction and without serious damage.
Step 2 Unpack the bike
Open the package and take out all of the parts. Be careful of not missing even a little piece of part.
The parts shall include:
Front Wheel
Frame
Manual
Charger
Keys (2 identical)
Headlight
Quick Release
Pedals
Toolkit
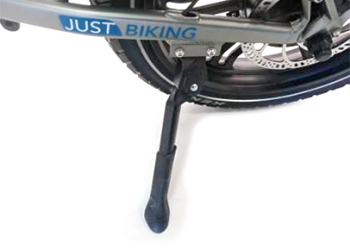
Step 3 Unfold the kickstand to make the bike stand up
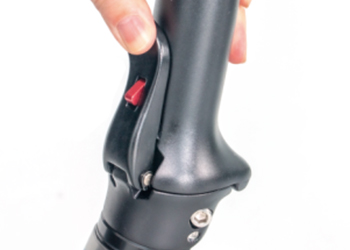
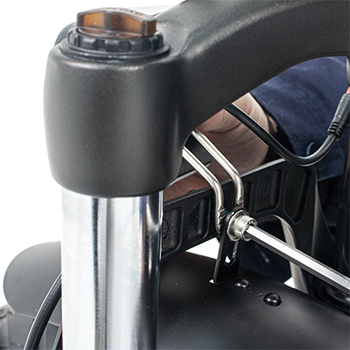
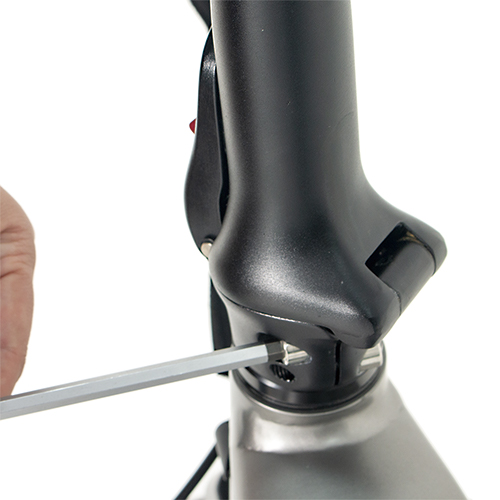
Step 4 Unfold the handle stem
Lift the handle stem up and lock it with the folding clasp.
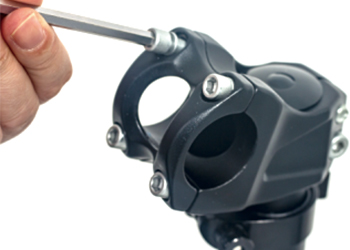
Step 5 Install the handlebar
5.1 Release the four bolts.
5.2 Install the handlebar to the handle stem and screw the four bolts again with matching wrench. During the installation, adjust the handlebar to an appropriate angle so that the bike can be operated comfortably.
5.3 Make sure the four bolts are screwd tightly and the handlebar cannot be moved.
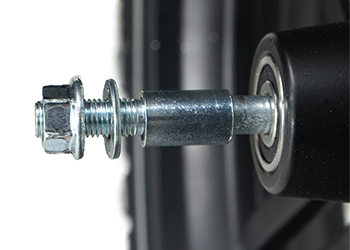
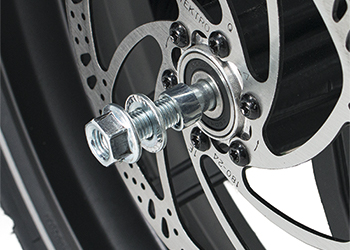
Step 6 Install the front wheel
6.1 Insert the quick release into the front wheel axle hole.
Note: The lenth of left axle sleeve is 22mm and the right axle sleeve is 8mm.
6.2 Install the tire into the front fork groove.
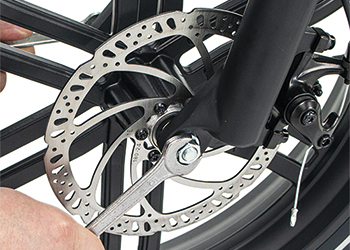
Note: Make sure the brake disc is placed between the two brake pads.
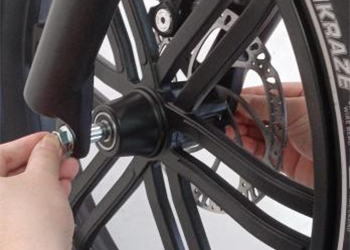
6.3 Screw the left and right nut together with two wrenches and make sure the front wheel is fixed to the front fork tightly.
6.4 Install the left and right dust proof cover.
Make sure the brake disc of the wheel will not rub the brake pad when it is rotating under the condition of not taking the brake.
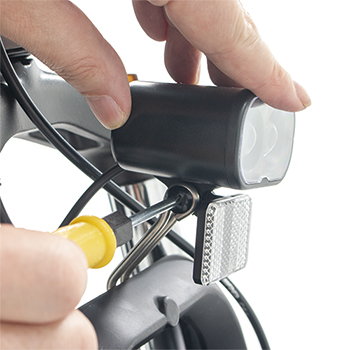
Step 7 Install the front fender and the front light
7.1 Screw the bolt and nut with matching wrench to Install the front fender and headlight on the front fork bridge.
7.2 Loose the bolt with a cross wrench to adjust the headlight angle so the light can illuminate the road ahead. Tighten the bolt when the adjustment is done.
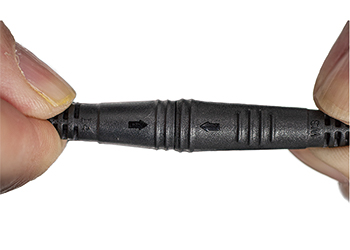
7.3 Connect the headlight cable.
Note: Make the two arrows stay in a line when pushing the connector.
7.4 Screw the two bolts to fix the side brace of the fender.
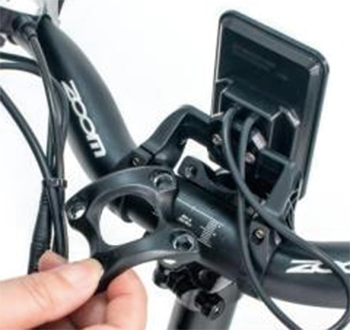
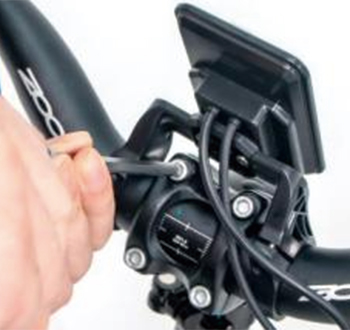
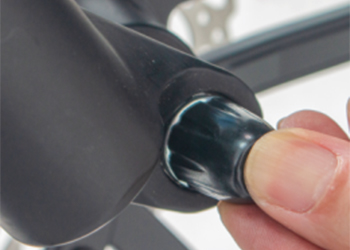
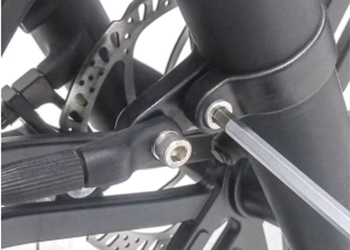
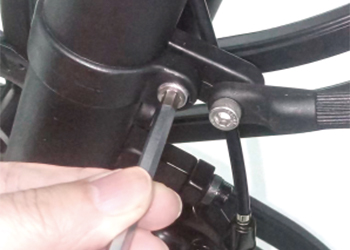
Step 8 Adjust and tighten the handle stem
Make the handlebar at a 90 degrees angle to the tire and then screw the two bolts tightly.
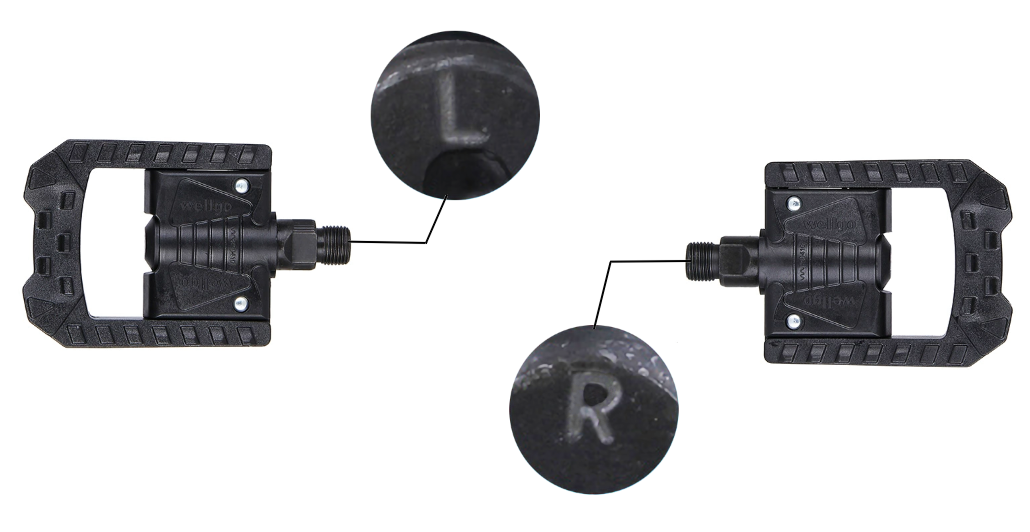
Step 9 Install the pedals
9.1 The "L" mark indicate it is the left pedal and the “R” mark indicate it is the right pedal.
9.2 Screw the left pedal bolt into the left crank with a wrench anticlockwise.
9.3 Screw the right pedal bolt into the right crank with a wrench clockwise.
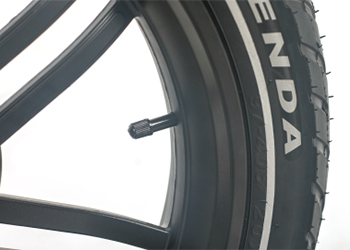
Step 10 Inflate the tyres
Check whether the tyres beads and tyres are evenly seated on the rims. Use a pump with a Schrader valve and pressure gauge to the recommended pressure indicated on the tyre sidewall.
Note: Do not over inflate or under inflate tyres.
NOTICE: Both wheels must be properly settled before operating your bike. If you are not able to assemble your bike, please contact us or look for help from a certified, reputable local bike mechanic. Ensure all hardware is tightened properly.